How to Install and Use Cypress in Visual Studio Code

Cypress is a popular end-to-end testing framework that makes automated testing easier and more efficient. It's open-source and easy to use, making it a great option for developers and QA engineers alike.
If you're looking to install Cypress on your Windows 10 machine, in VS Code, or using npm, you've come to the right place. In this article, we'll cover all of the steps necessary to get you up and running with Cypress.

Note: If you dont have visual studio installed on your system, you can download it from https://visualstudio.microsoft.com/downloads/
Step 1: Open Visual Studio Code and Create a Project
To get started, open your Visual Studio Code editor and create a new project or open an existing one. This project will serve as the foundation for your web application and will be the environment where you install and use Cypress.
Step 2: Open the Integrated Terminal
Next, open the integrated terminal in Visual Studio Code by pressing "Ctrl + ` " or by going to "View" -> "Terminal" -> "New Terminal". The integrated terminal allows you to run command-line tools and utilities directly within the editor.
Step 3: Navigate to Your Project's Root Directory
Once you have opened the integrated terminal, navigate to the root directory of your project by using the "cd" command followed by the directory path. This step is essential to ensure that Cypress is installed in the right location within your project.
Step 4: Install Cypress
To install Cypress, run the following command in the terminal:
npm install cypress --save-dev
This command installs the latest version of Cypress and saves it as a development dependency in your project's package.json file.
Note
If you get any error, make sure npm / node is installed. To check whether npm (Node Package Manager) is installed on your system or not, you can -
1. open a terminal or command prompt window on your system, type the following command and hit enter:
npm -v
2. If npm is installed, you should see a version number in the output. For example, 6.14.15
If npm is not installed, you will see an error message indicating that the command is not recognized or not found.
Alternatively, you can also check whether Node.js is installed or not, since npm is usually installed along with Node.js. You can do this by typing node -v in the terminal or command prompt window. If Node.js is installed, you should see a version number in the output. For example, v14.16.0.
Step 5: Open Cypress
After the installation is complete, you can open Cypress by running the following command in the terminal:
npx cypress open
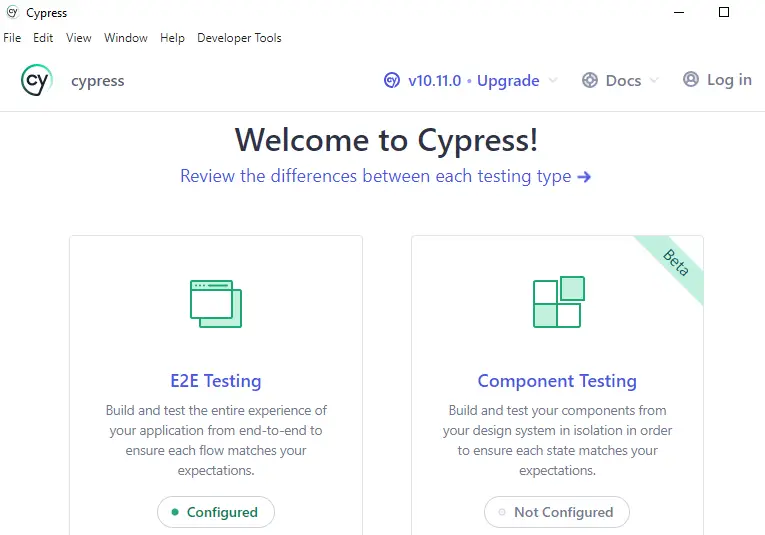
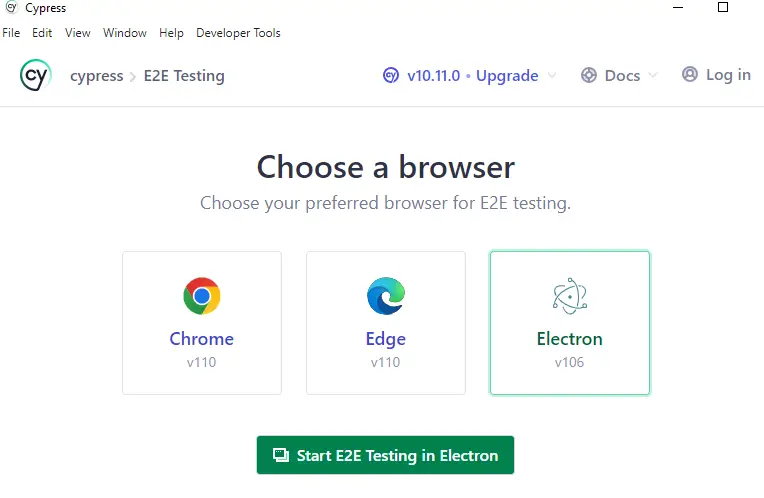
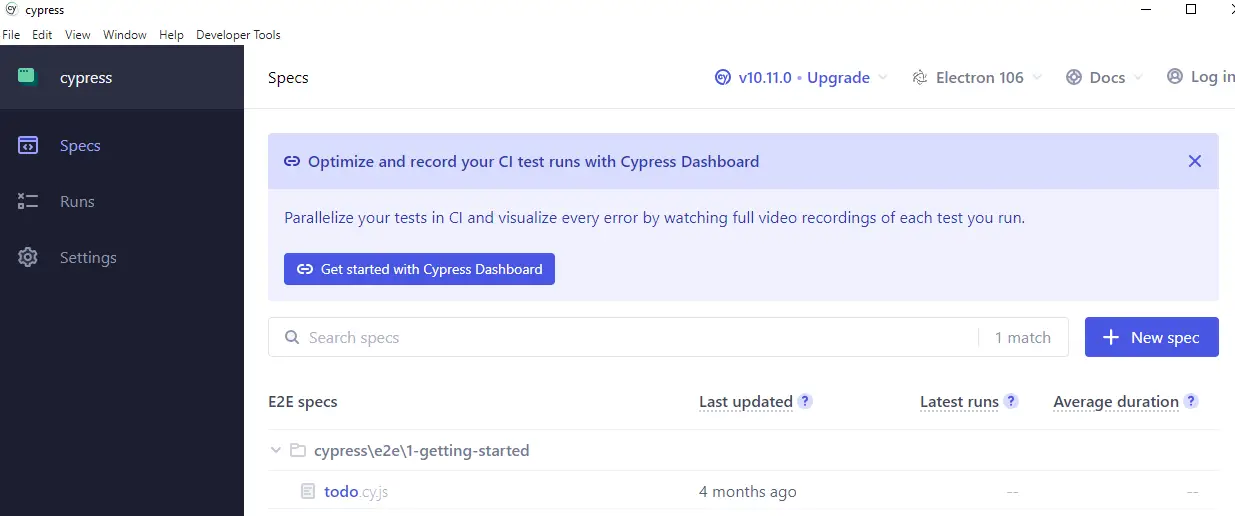
This launches the Cypress Test Runner in a separate window ( as shown below ), where you can choose browser, write and run your tests.

Click on E2E Testing

Start E2E Testing in Electron / Chrome / Edge

Run tests
Step 6: Use HeadLess Cypress
Now that you have Cypress installed and opened cypress in Test Runner window, you can now run Cypress Headlessly.
If you prefer to run your tests in the command line without opening the Test Runner window, you can use the following command:
npx cypress run
This command runs your tests in the command line, allowing you to automate your testing process.
C:\techoral\poc\cypress>npx cypress run


====================================================================================================

  (Run Starting)

  ┌────────────────────────────────────────────────────────────────────────────────────────────────┐
  │ Cypress:        10.11.0                                                                        │
  │ Browser:        Electron 106 (headless)                                                        │
  │ Node Version:   v18.12.0 (C:\Avi\tools\node-v18.12.0-win-x64\node-v18.12.0-win-x64\node.e      │
  │                 xe)                                                                            │
  │ Specs:          1 found (todo.cy.js)                                                           │
  │ Searched:       cypress/e2e/**/*.cy.{js,jsx,ts,tsx}                                            │
  └────────────────────────────────────────────────────────────────────────────────────────────────┘


────────────────────────────────────────────────────────────────────────────────────────────────────

  Running:  todo.cy.js                                                                      (1 of 1)


  example to-do app


    √ Visit Fathom website (3250ms)


  1 passing (6s)


  (Results)

  ┌────────────────────────────────────────────────────────────────────────────────────────────────┐
  │ Tests:        1                                                                                │
  │ Passing:      1                                                                                │
  │ Failing:      0                                                                                │
  │ Pending:      0                                                                                │
  │ Skipped:      0                                                                                │
  │ Screenshots:  0                                                                                │
  │ Video:        true                                                                             │
  │ Duration:     6 seconds                                                                        │
  │ Spec Ran:     todo.cy.js                                                                       │
  └────────────────────────────────────────────────────────────────────────────────────────────────┘


  (Video)

  -  Started processing:  Compressing to 32 CRF
  -  Finished processing: C:\Avi\poc\cypress\cypress\videos\todo.cy.js.mp4                (1 second)


====================================================================================================

  (Run Finished)


       Spec                                              Tests  Passing  Failing  Pending  Skipped
  ┌────────────────────────────────────────────────────────────────────────────────────────────────┐
  │ √  todo.cy.js                               00:06        1        1        -        -        - │
  └────────────────────────────────────────────────────────────────────────────────────────────────┘
    √  All specs passed!                        00:06        1        1        -        -        -


C:\techoral\poc\cypress>npm
Conclusion
In this article, we have shown you how to install and use Cypress in Visual Studio Code. By following these steps, you can start testing your web applications efficiently and effectively, helping you improve the quality of your code and catch any bugs before they reach your users. So, what are you waiting for? Start using Cypress today and take your web development to the next level!
Read Next :
- Cypress Installation Errors
- How to use Environment Variables in Cypress
- Cypress Uncaught Exception Handling
- Cypress Automation Examples
- Cypress Automation Tool Interview Questions
- Cypress File Upload Examples
- Error 509 Bandwidth Exceeded
- Cypress Commands
- Cypress Custom Commands
- Handling Cypress Tokens & LocalStorage
- Handling Cypress Multitabs
- Cypress Parallelization
- Cypress waits
- Cypress Still Waiting Error
- Cypress Test Run Errors
- Cypress vs Selenium vs Puppeteer
- Cypress vs Selenium
- Cypress vs Puppeteer
Cypress Tutorials
Cypress Archives
- Cypress Installation Errors
- How to Install Cypress
- How to use Environment Variables in Cypress
- Cypress Uncaught Exception Handling
- Cypress Automation Examples
- Cypress Automation Tool Interview Questions
- Cypress File Upload Examples
- Error 509 Bandwidth Exceeded
- Cypress Commands
- Cypress Custom Commands
- Handling Cypress Tokens & LocalStorage
- Handling Cypress Multitabs
- Cypress Parallelization
- Cypress waits
- Cypress Still Waiting Error
- Cypress Test Run Errors
- Cypress vs Selenium vs Puppeteer
- Cypress vs Selenium
- Cypress vs Puppeteer