How to uninstall Java on windows
Uninstall Java on windows
Uninstall Java Manually :
We can uninstall Java manually in the same way as we would uninstall any other programs from Windows System.
Here is the step by step procedure to uninstall Java on Windows 10 / Windows 8 / Windows 7.
Uninstall Java from Windows 10
- Log on to windows 10 and click Start
- Click on Settings
- Click on System
- Choose Apps & features
- Click on the program to uninstall and then click its Uninstall button. follow the instructions to complete the uninstall.
- Log on to windows 8 and click Start.
- Click on Search box and type control panel.
- Click on control panel and select Uninstall a Program from the Program Category.
- Select the Java and right click and then click on uninstall.
- Click Yes to Confirm the uninstall process.
- Log on to windows 7 / Vista and click Start.
- Click on control panel.
- Click on control panel and select programs.
- Click on Programs and Features and Select the Java to be uninstalled.
- Click on Uninstall button to finish uninstall Java.
Uninstall Java from windows 8
Uninstall Java from windows 7
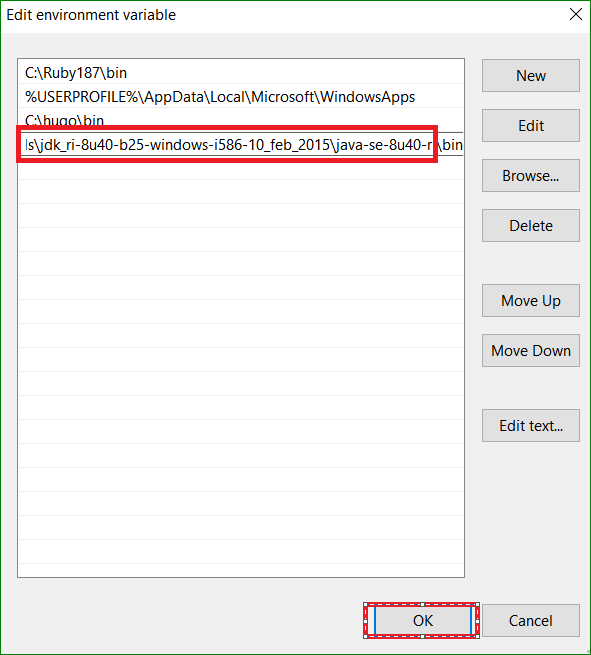
Uninstall Java from windows - By removing Java bin path from System PATH Variable
Go System Properties and then to Edit the system environmental variables and Click on Environment Variables.

Edit the path variable

Delete path variable if its not already removed and click OK to finish.
Go to command prompt and type java -version and confirm the uninstall
Java -version