OAuth 2.0 Authentication with Spring Boot Example
Introduction
In this tutorial, we will explore how to implement OAuth 2.0 authentication in Spring Boot. We will provide a comprehensive OAuth 2.0 Spring Boot example to demonstrate how you can secure your application using this authentication protocol. By the end of this guide, you will know how to get an access token in Spring Boot using OAuth2 and set up an OAuth2 client in Spring Boot.
Prerequisites
- Basic knowledge of Java and Spring Boot
- GitHub account
- Java Development Kit (JDK) installed
- Spring Boot CLI or IDE like IntelliJ IDEA or Eclipse
Step 1: Set Up a GitHub OAuth App
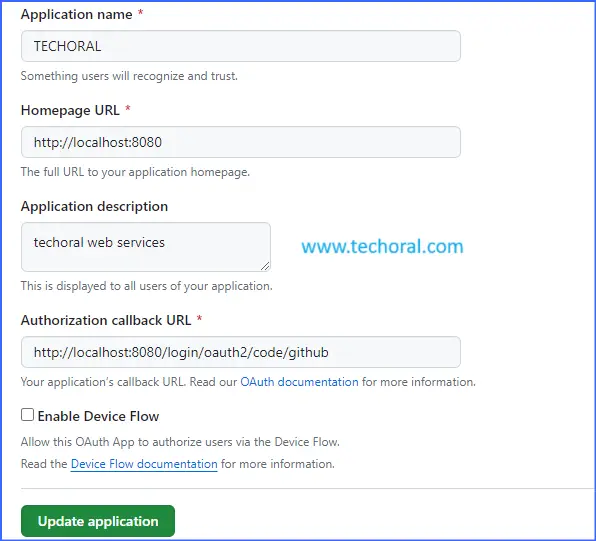
- Go to GitHub Developer Settings.
- Click "New OAuth App".
- Fill in the application details:
- Application name: Your application name
- Homepage URL:
http://localhost:8080 - Authorization callback URL:
http://localhost:8080/login/oauth2/code/github
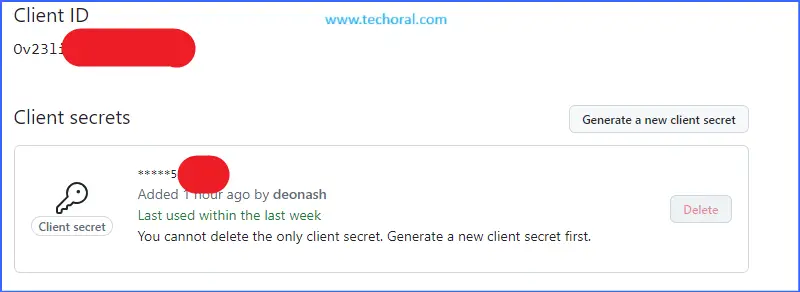
- Click "Register application" and note down the Client ID and Client Secret.
Step 2: Create a Spring Boot Project
Create a new Spring Boot project using Spring Initializr or your preferred method. Include the following dependencies:
- Spring Web
- Spring Security
- OAuth2 Client
- Thymeleaf (optional for a simple UI)
Step 3: Configuring OAuth 2.0 in Spring Boot
In your application.yml or application.properties, add the following configuration:
spring.application.name=oauth

logging.level.org.springframework.security=TRACE

# GITHUB

spring.security.oauth2.client.registration.github.client-id=CLIENT-ID
spring.security.oauth2.client.registration.github.client-secret=CLIENT-SECRET
Step 4: Implementing OAuth 2.0 Authentication in Spring Boot
Create configuration Class
Create a configuration class to handle OAuth 2.0 authentication. This example will show you how to implement OAuth 2.0 in Spring Boot to authenticate users with Github
package com.techoral.oauth.config;

import org.springframework.context.annotation.Bean;
import org.springframework.context.annotation.Configuration;
import org.springframework.security.config.annotation.web.builders.HttpSecurity;
import org.springframework.security.config.annotation.web.configuration.EnableWebSecurity;
import org.springframework.security.web.SecurityFilterChain;

import static org.springframework.security.config.Customizer.withDefaults;

/**
 * @author www.techoral.com
 *
 */
@Configuration
@EnableWebSecurity
public class SBootSecurityConfig {

	@Bean
	SecurityFilterChain securityFilterChain(HttpSecurity http) throws Exception {

		return http.authorizeHttpRequests(auth -> {
			auth.requestMatchers("/").permitAll();
			auth.anyRequest().authenticated();
		}).oauth2Login(withDefaults()).formLogin(withDefaults()).build();

	}

}
Create Controller
Create a simple controller
package com.techoral.oauth.controller;

import org.springframework.web.bind.annotation.GetMapping;
import org.springframework.web.bind.annotation.RestController;

@RestController
public class SBController {

	@GetMapping("/")
	public String home() {
		return "hello techoral";
	}

	@GetMapping("/secured/api")
	public String securedAPI() {
		return "Hello Secured API";
	}

}
Step 5: Running the Application
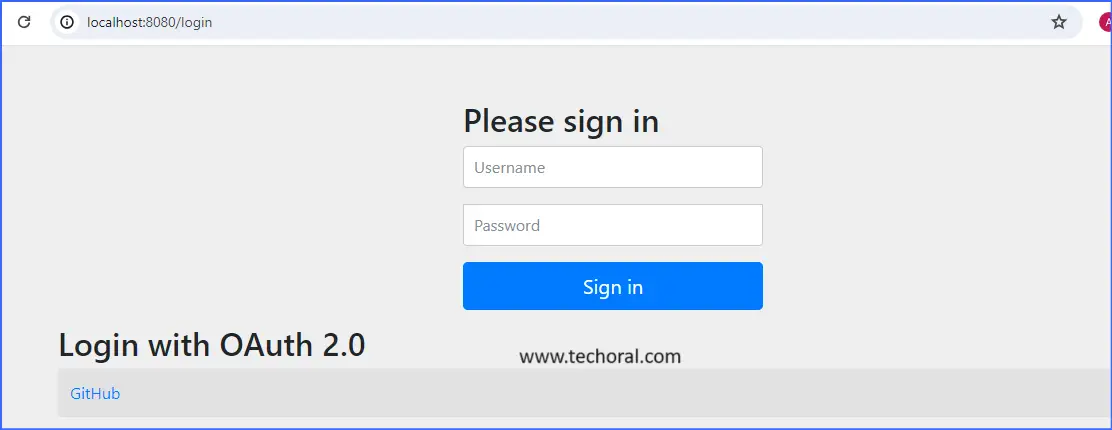
Run your Spring Boot application. Open http://localhost:8080 in your browser. Click on the login link, which will redirect you to GitHub for authentication. After successful login, you will be redirected back to your application and see the user's details.
Conclusion
In this tutorial, we have provided a comprehensive guide on how to implement OAuth 2.0 authentication in Spring Boot. We covered setting up the project, configuring OAuth 2.0, and creating a basic example to demonstrate the authentication flow. You can now apply these concepts to secure your own Spring Boot applications using OAuth 2.0.
Checkout Springboot Oauth Source Code on GitHub